Table of Contents
Create, Edit, and Share your videos with Panopto
There are two ways to create a Panopto video:
- From your Canvas course:
- Login to Canvas at canvas.temple.edu
- Go to any course and click on Panopto Video on the left side menu
- Click on Create. This creates the video in that Canvas Course.
- From your Panopto personal folder (My Folder):
- Login to Panopto at: video.temple.edu with your SSO (single sign on) credentials
- Click on Create. This creates the video in your personal My Folder in Panopto.
Check out these short training videos on:
The Basics
- Trimming a Video (4:44)
- Using Smart Chapters (2:15)
Uploading Videos Created Outside of Panopto
Panopto supports many video file formats, including AVI, MP4, MPG, WMV, MOV, QT, ASF, 3GP, WMA, MP3, M4V.
If your videos are not already in Panopto, go to the folder where you want your videos and upload them.
For a quick video on how to do that please watch:
Sharing Videos
Videos created from the Panopto Video area in a Canvas course will be viewable by the students in your class if they click on Panopto Video in the Canvas course or if the video has been embedded or linked correctly in the course. Please follow the steps below to embed or link your videos in your Canvas course.
Videos created in your personal folder in Panopto are private by default, but can be shared by changing your sharing setting for the video.
Video Quizzing
Did you know you can add a quiz to videos created outside of Panopto as well as those created with the product?
You can also turn a video quiz into a Canvas Assignment with Gradebook scoring.
Additional Training
Retention Policy
Questions?
Email cphithelp@temple.edu to schedule a consultation for recording questions.
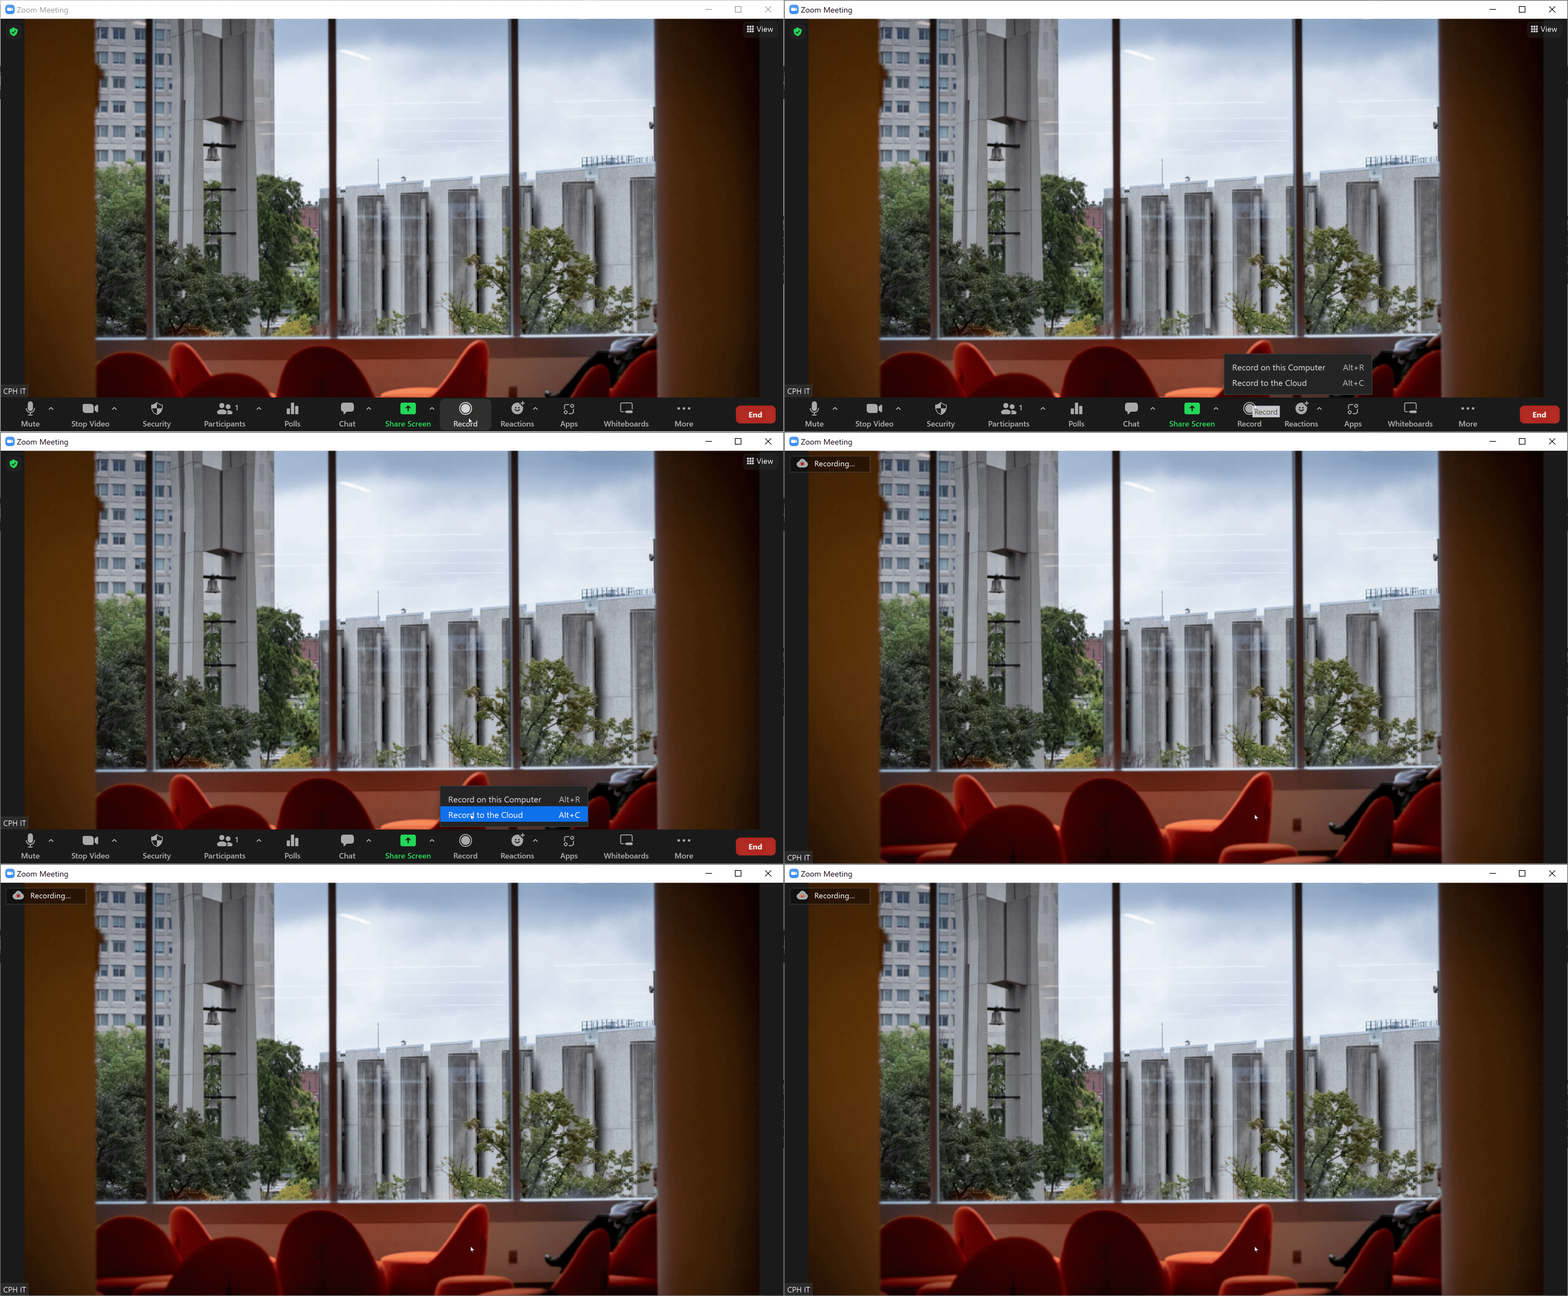
Prefer to Record with Zoom? Check Out These Important Settings
There are two options for recording with Zoom, depending on the quality of the recording needed:
- Cloud recording: Conveniently record synchronous sessions directly to the cloud
- Local recording: For the best quality when recording your speaker view
(NOTE: The speaker view records a low resolution recording at 640x360 when recording directly to the cloud. It is recommended if you need a better quality recording in speaker view, to record to the local computer).
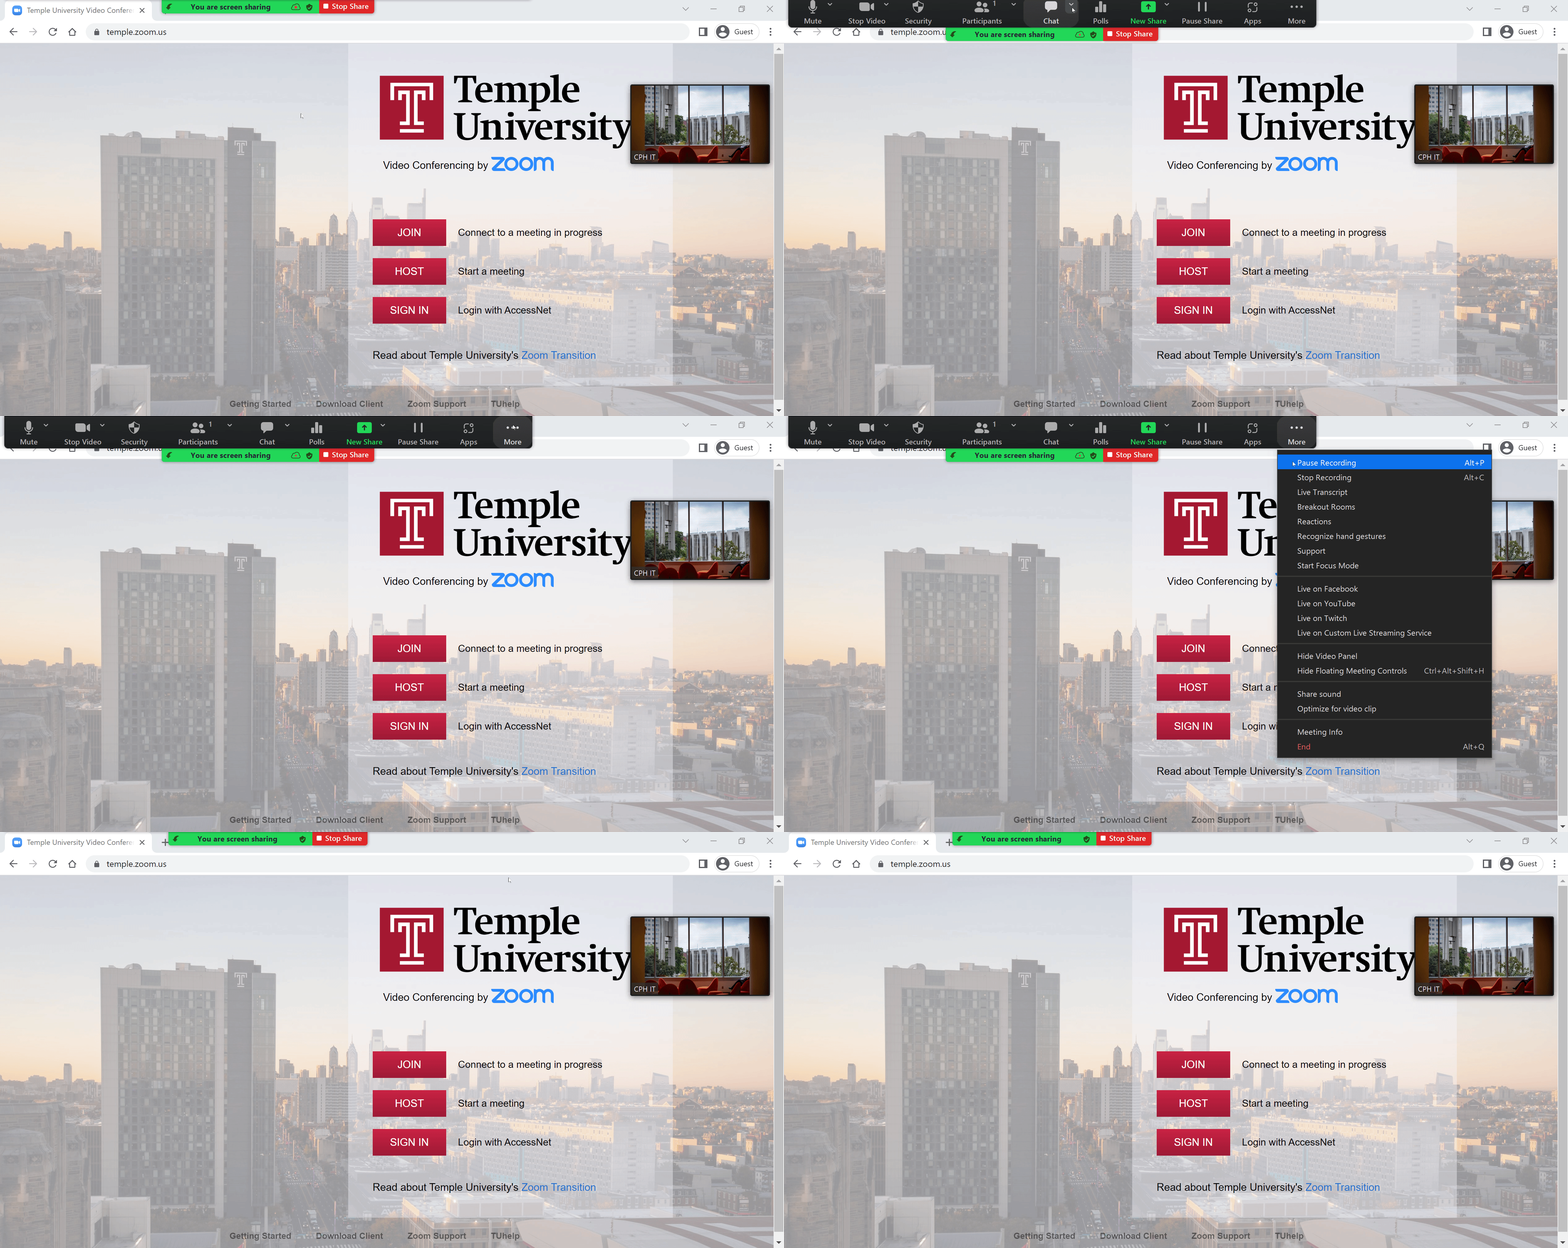
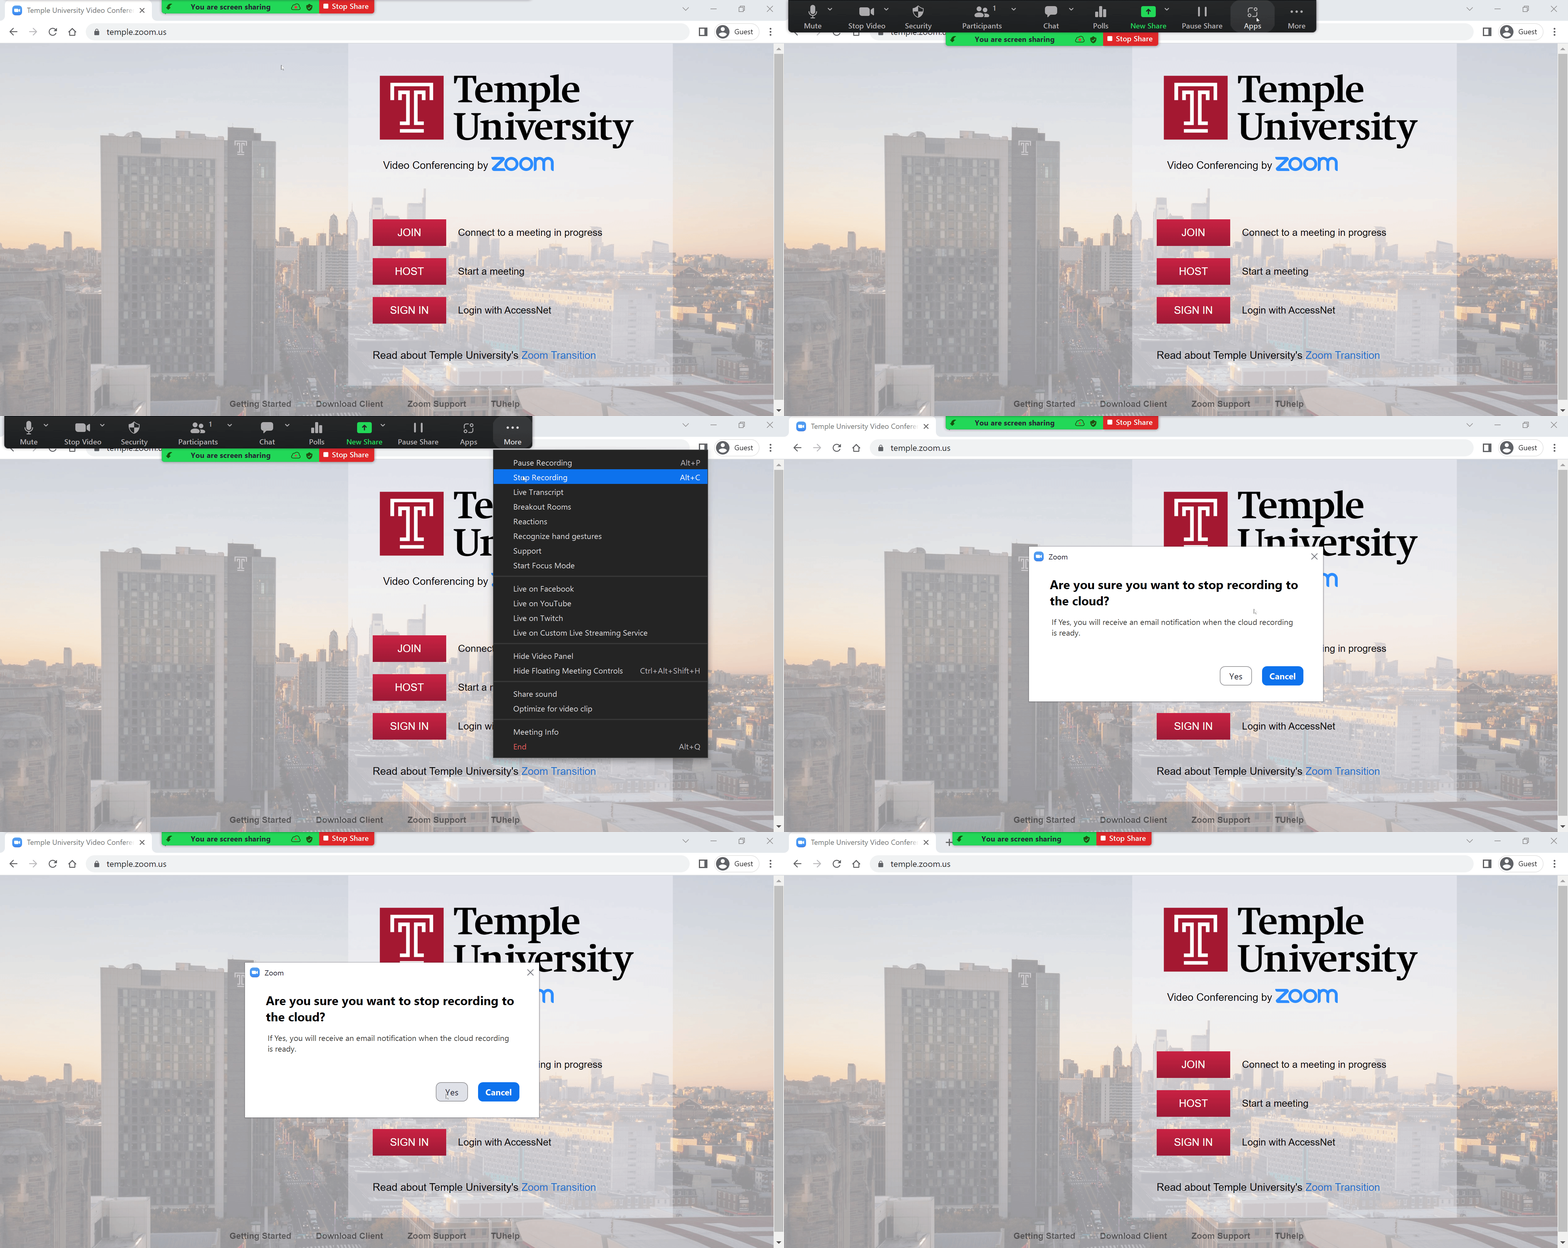
Recording to the Cloud - Click to expand
Captioning
For information about requesting closed captioning, please view the Video Captioning Page.


