Table of Contents
Using Zoom at Temple University
Zoom is an easy-to-use web conferencing solution that provides HD video and audio and robust collaboration, recording and security features.
Getting Started
Quick Start Guide
- Zoom Quick Start Guide is available at: Zoom Support Site
- A Frequently Asked Question Guide is available at: Zoom Frequently Asked Questions
Scheduling a Meeting
There are multiple ways to schedule a Zoom meeting, including:
- Through Canvas (for online class sessions)
- On the web via zoom.temple.edu
- Through the Zoom Desktop client
- On the mobile app
Joining a Meeting
Join a meeting by clicking the meeting link provided to you or by going to https://zoom.us/join and entering in the meeting ID. Learn more about joining a meeting.
On most devices, you can join computer/device audio by clicking Join Audio, Join with Computer Audio, or Audio to access the audio settings. Learn more about connecting your audio.
A Bluetooth headset can be used as long as the Bluetooth device is compatible with the computer or mobile device that you are using. While you are not required to have a webcam to join a Zoom Meeting or Webinar, you will not be able to transmit video of yourself without one. You will continue to be able to listen and speak during the meeting, share your screen, and view webcam video of other participants.
In-Meeting Features
Sharing Your Screen
Click Share in your meeting and choose the screen that you would like to share. Learn more about sharing your screen.
Focus Mode
Focus mode gives the host and co-host ability to view everyone without participants seeing each other's videos. The purpose is to minimize distractions while students work on class assignments. This setting also allows the host and co-host the ability to view each participant's shared screen, while each participant will only see their own shared content.
Focus mode can be enabled during a meeting when clicking on "More" and then "Start Focus Mode." To end Focus Mode, click on "More" and then "Stop Focus Mode."
If you would like to turn off the ability to use Focus Mode in your meetings, login at zoom.temple.edu. Click on "Settings" and located "Focus Mode." Toggle the setting off. Moving forward, Focus Mode will no longer appear as an option during your future Zoom meetings.
Video (3:55): Focus Mode
Polling
Zoom allows you to create single choice, multiple choice, or advanced polling questions such as matching, ranked choice, short answer, and long answer options. You will be able to launch the poll during your meeting; gather responses from attendees; and, if desired, download a report of polling after the meeting. Polls can also be conducted anonymously. Learn more about Polling in Zoom
Using Virtual Backgrounds
There are virtual backgrounds provided by Zoom and by Temple. Check out the backgrounds provided by the CPH Marketing & Communications team which can be found in the CPH section of TUPortal. Learn more about enabling a virtual background.
Viewing Captions in a Meeting or Webinar
Automatic captioning is available to view during a meeting. Learn more about viewing captions.
Recording
Retention Period for Zoom Recordings
Cloud recordings older than 120 days will be deleted for faculty and staff; recordings older than 30 days will be deleted for students. These recordings will be moved into the Zoom trash and permanently deleted after 30 days. If you wish to keep any of these recordings, please download them to your local storage.
Starting a Recording
All Temple Zoom hosts can record to the cloud or locally to their computer.
- In a Zoom meeting, press Record to start the recording
- To pause a Zoom recording, hover over the bottom of the Zoom window and click on Pause
- By default, local recordings are saved to your documents folder; cloud recordings can be found on the Recording page of your Zoom web portal
Downloading a Recording
To download a recording to your computer, go to zoom.temple.edu
- Click Sign In
- Click Recordings on the left
- Click the More button next to the recording and select Download.
Deleting a Recording
To delete a recording, perform the same steps as above, but click Delete instead of Download. For multiple recordings, you can also click the check boxes on the left and select Delete Selected or Delete All.
Meeting Controls
Controlling Access to Zoom Meetings
Setting up waiting rooms, limiting access to Temple users only, removing users, and locking meetings are some of the methods that can be used to prevent unauthorized participants from joining your meeting.
For faculty, you can use Zoom for online office hours using the waiting room feature to keeping meetings secure.
Meeting Chat Controls
Use the steps below to prevent participants from sending private chats to other participants during your meetings.
Turn Off Private Chat in Settings
| 1. Log into zoom.temple.edu | |
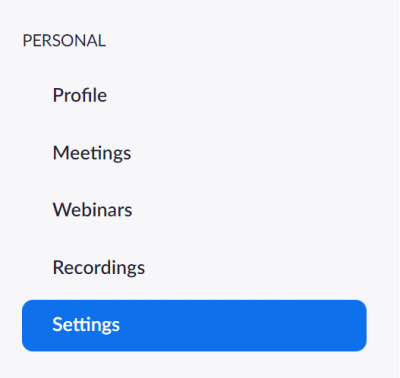
| 2. Click on Settings |  |
| 3. Locate Private Chat |  |
| 4. Toggle this setting off so that the button is gray |  |
This will prevent participants from chatting with other participants privately during your meetings.
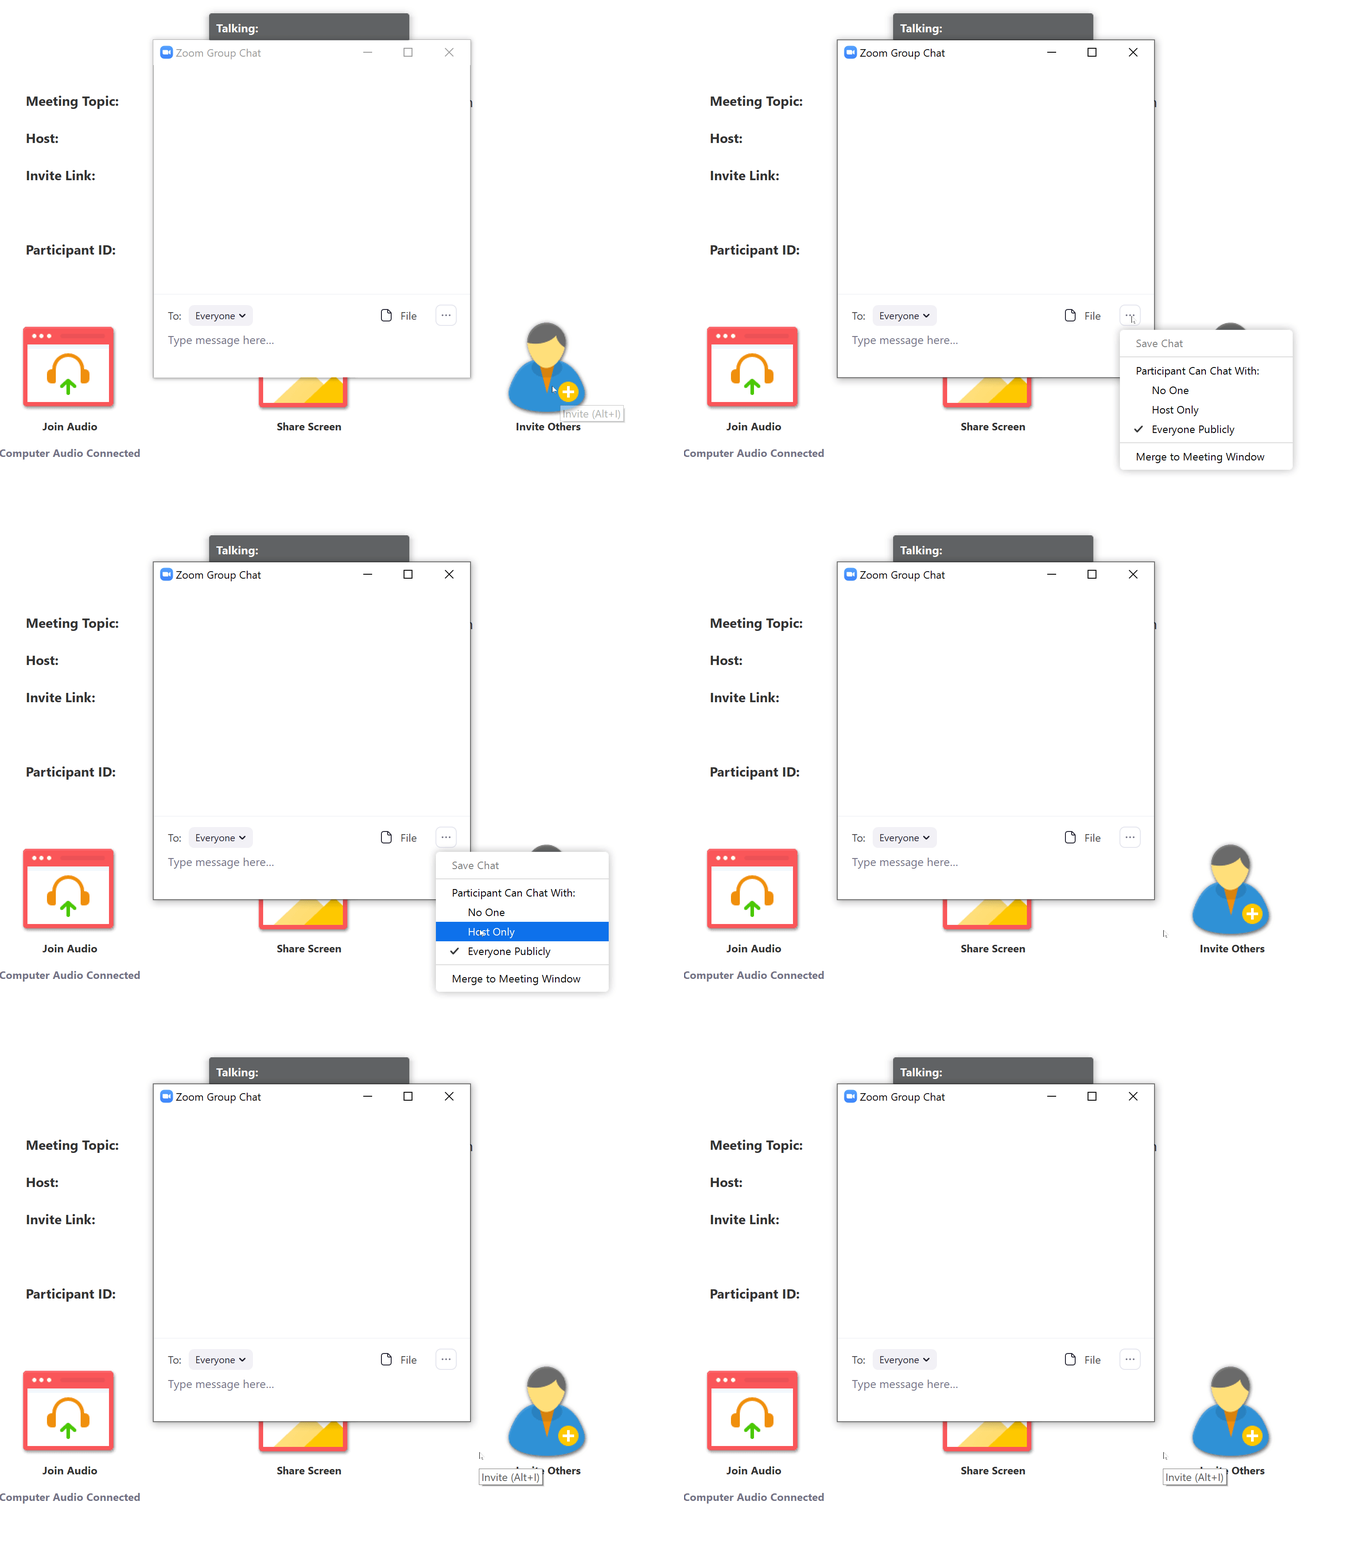
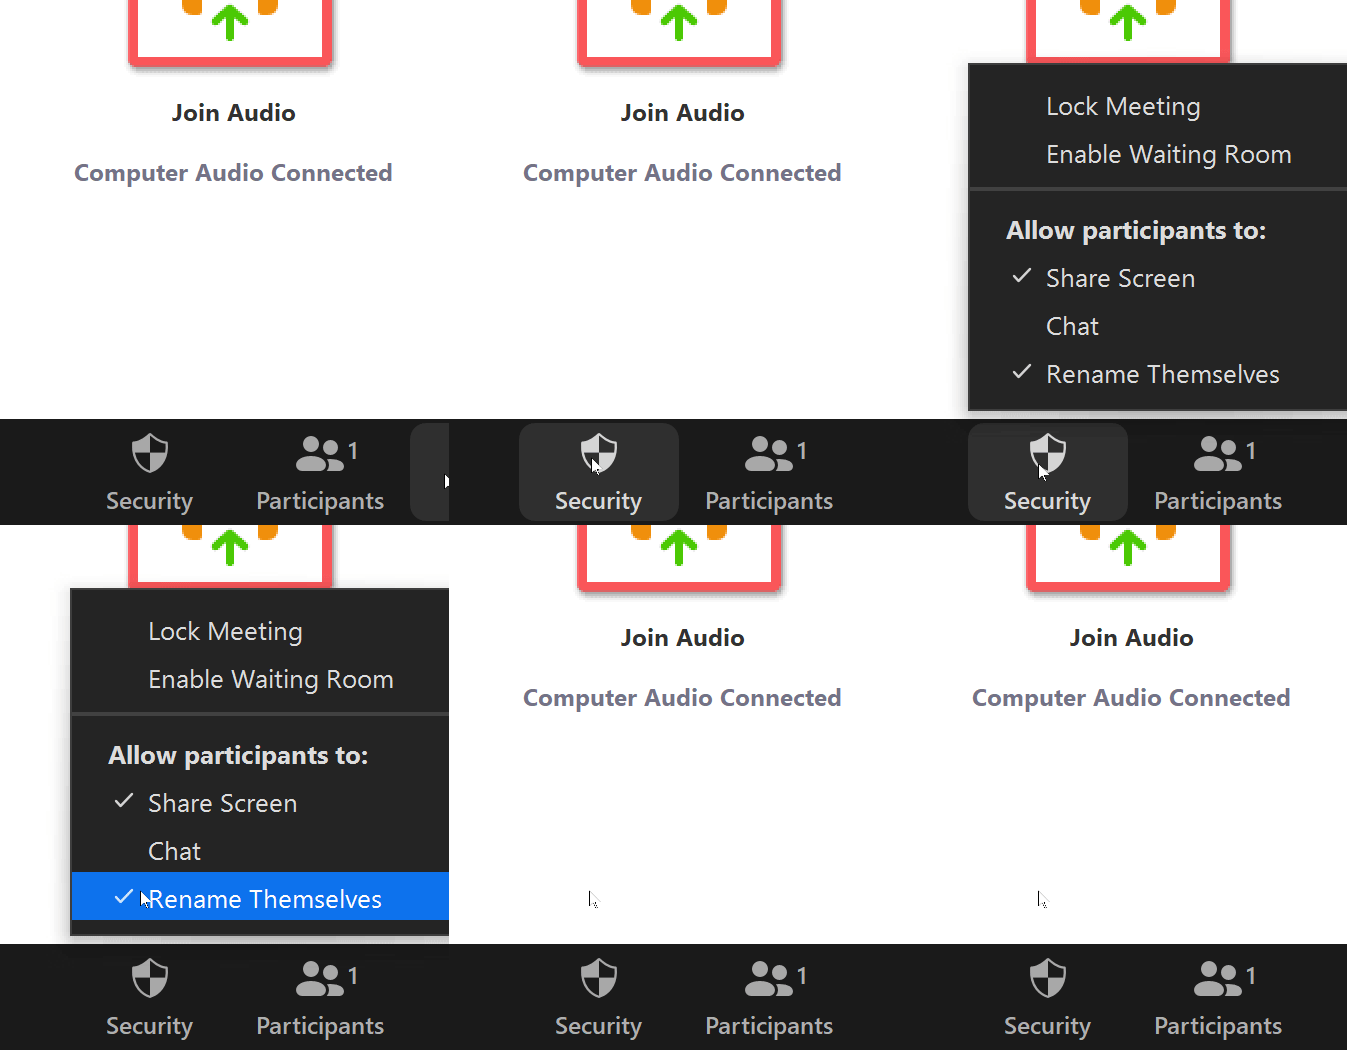
Disable Chat During a Meeting or Allow Participants to Chat with Host Only
Disable chat if you do not want to allow participants to chat with anyone, even the host:
If you would like participants to be able to chat with the host only, follow these steps:
AI Companion
Zoom AI Companion features are available for faculty and staff to enable in their Temple Zoom accounts. Please review the Center for the Advancement of Teaching's Guidelines for Generative Artificial Intelligence (GenAI) Note-Taking Tools for more information. Features that are locked by admin have not been approved for use at Temple at this time. Any AI Companion meeting notes should be reviewed for accuracy before distributing as the tool is capable of making errors.
To enable Zoom AI Companion features:
- Go to https://zoom.temple.edu
- Click on Settings
- Click on AI Companion. Toggle settings on that you would like to use.
Features that are available include:
Getting Help
If you have any questions about Zoom at Temple, please contact the Help Desk at 215-204-8000 or submit a tuhelp ticket.
On-Demand Training
For self-service assistance, visit the Zoom support site.


