Hosting Online Advising Appointments or Office Hours with Zoom
Faculty and advising staff can use Zoom to host online advising appointments or office hours. Faculty and Advisors can schedule meetings with individual students or they can create a meeting and use the "Waiting Room" feature to control when students enter a meeting. This feature allows users to admit students one by one or all at once.
Enable Waiting Room When Scheduling a Meeting
- Log in to zoom.temple.edu, and use your Temple AccessNet username and passowrd.
- Click on Meetings on the left side menu
- Click Schedule a New Meeting
- Note: If you plan to reuse this meeting link for a recurring time slot, be sure to select Recurring Meeting and choose how often this meeting should occur.
- Under "Meeting Options," check off the box next to Enable Waiting Room
- Click Save
Video (0:49): Enable Waiting Room When Scheduling a Meeting
Admit Students During a Meeting
After you have provided a join link to the students, they can click on the link to connect to the meeting. However, they will be brought into the waiting room unless you admit them into the meeting. Follow the steps to admit students into the meeting. The instructions have been adapted from Zoom's support center. For more details on Zoom Waiting Rooms, please see Zoom Waiting Rooms Information
| 1. Click on Manage Participants |  |
| 2. Click Admit next to the participant's name to allow them to join the meeting | 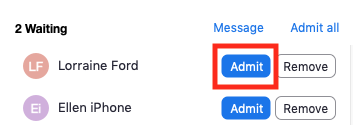 |
| 3. If you would like to allow all participants to join the meeting, click Admit All |  |
Remove Students from a Meeting
If you would like to remove a participant from a meeting, click on Remove next to the participant's name.

Lock Your Office Hours Meeting
Click on the Security button in the meeting control bar, then select Lock Meeting. After your meeting is over, put that student back in the waiting room and unlock your meeting. Go back to your waiting room, admit the next student for office hours and repeat the process.
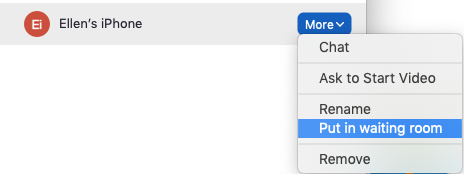
Putting a Student Back into the Waiting Room
If you would like to send a participant back to the waiting room, click on More next to the participant's name and click Put in Waiting Room