
Free Boot Camp and Windows 10 Installation
Attention: Bootcamp will not run on the new Apple M1 Macs.
As of Jan 2021, there is no version of Bootcamp, VMware, or Virtualbox that will run on the new Apple M1 computer. If you must run Windows for your course for products like SAS, they will not run on an Apple M1 Mac for Spring 2022 semester.
There is no workaround. Please plan accordingly.
As of Jan 2021, there is no version of Bootcamp, VMware, or Virtualbox that will run on the new Apple M1 computer. If you must run Windows for your course for products like SAS, they will not run on an Apple M1 Mac for Spring 2022 semester.
There is no workaround. Please plan accordingly.
Please review the CPH laptop requirements for guidance on appropriate laptops, as well as information on rentals and loaners.
Windows 10 is available for free to all Temple University students. In order for Mac users (with the exception of the M1 Mac) to run Windows 10 on their computers, they must run a program called Boot Camp, which is also free to Temple students, or a similar program. Windows 10 is available via the OnTheHub website.
Before beginning this installation, it is highly recommended that you make a backup of important files to a USB device or cloud storage.
Step 1: Log in to OnTheHub
- Go to OnTheHub
- The Temple login screen will appear
- Enter your AccessNet username and password
Step 2: Obtain a Copy of Windows 10
- Once logged in, click on Windows 10 under the Microsoft category
- Click add to cart, and follow the steps to order the software
- *PLEASE SAVE THE ACCESS CODE IN AN EMAIL OR FILE ON YOUR COMPUTER* You can only access the page that has the serial number for 30 days after the purchase
Step 3: Download Windows 10 Education
- Select Windows 10
- Click Confirm
- Choose English
- On the download page, choose the 64 bit version
Step 4: Install Windows 10 with Boot Camp
| 1. | Once the Windows ISO file has finished downloading, we are ready to begin installing Windows with Boot Camp. The Boot Camp installer can be found by clicking on the the spotlight icon in the upper right corner and typing "boot camp". Once the program is running, it will automatically locate the windows ISO file you downloaded | 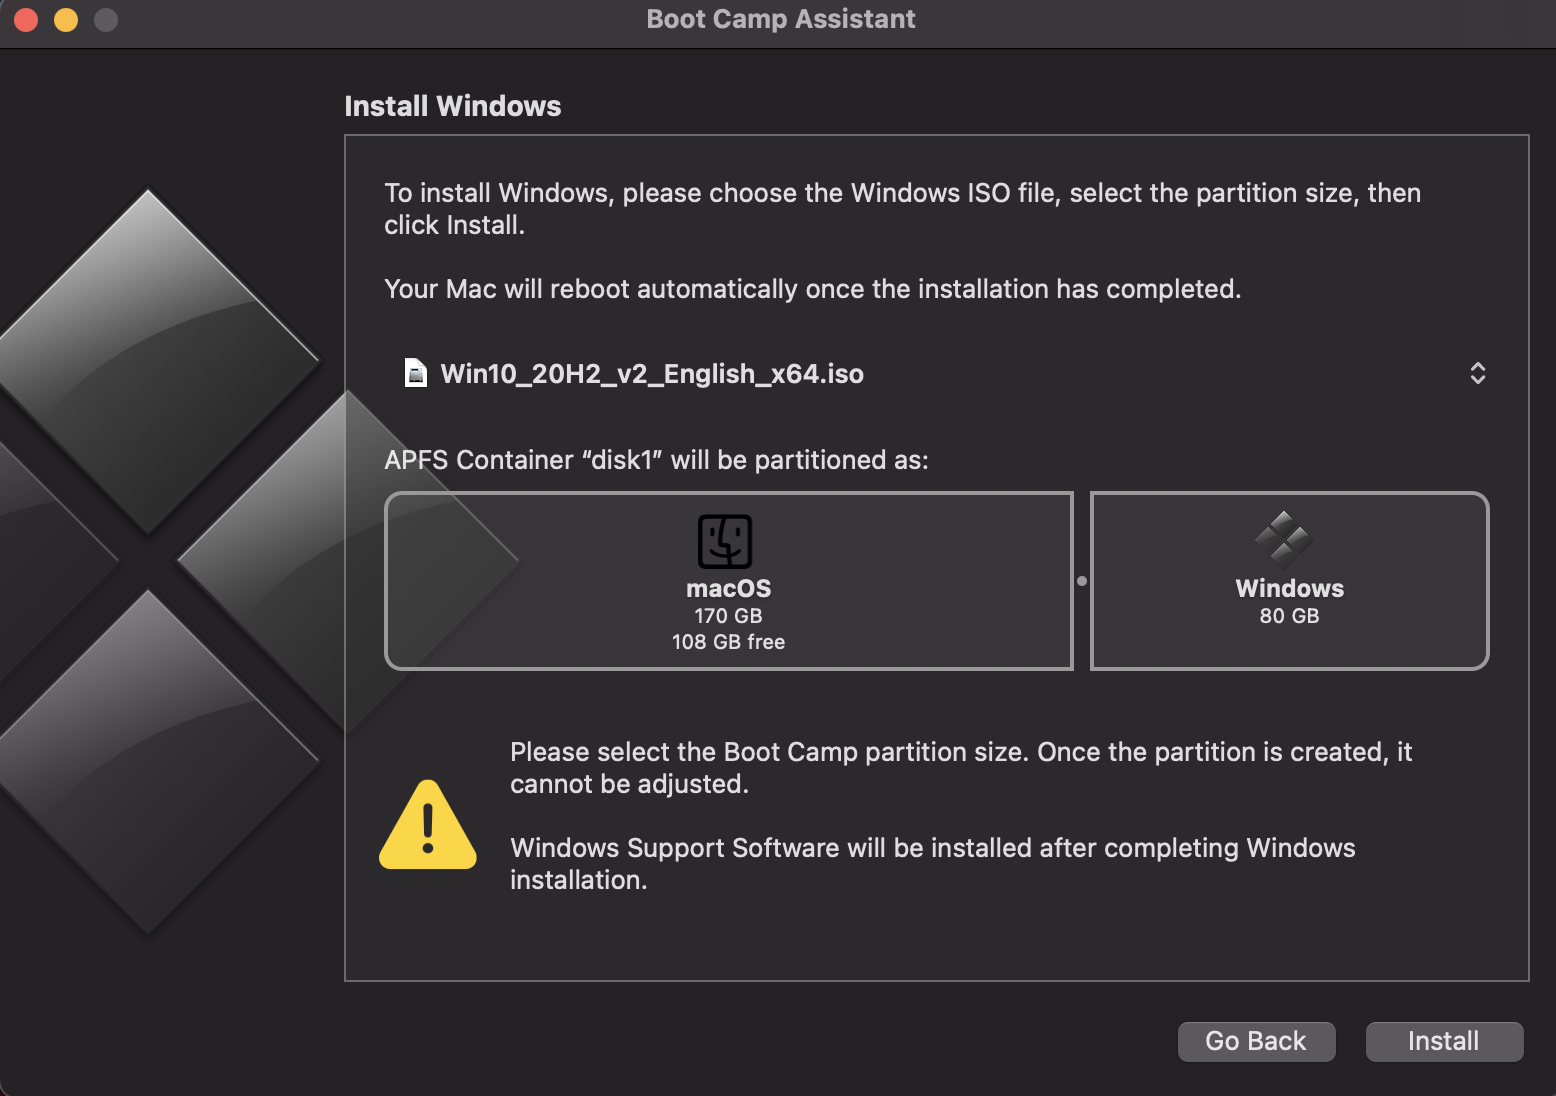 |
| 2. | The next stage involves splitting up your drive for the Windows section. It may default to 40 GB, but that is not enough for SAS. So at a minimum, please set the Windows partition size to at least 80 GB by clicking on the space between the Mac drive and the Windows drive and dragging to the left. 90 to 100 GB is better if you have the space. |  |
| 3. | Click install and enter your password; after a few minutes the computer will download additional support files for windows and copy the installer and extra files to the boot camp space, then it will restart into the windows installer |  |
| 4. | Click Install Now, and, on the next screen, enter the serial number you received from onthehub.com and click Next |  |
| 5. | Choose Windows 10 Education |  |
| 6. | Check the checkbox I accept and and click Next |  |
| 7. | You will be prompted to connect to a network; choose Skip Now. Create a user name, password and 3 security questions |  |
| 8. | Here comes a very important step. Please follow directions closely or you may lose data from your computer! Select the third drive named bootcamp and click format. Once that completes you can click Next. This will begin the actual installation process for windows which can take up to 30 minutes. | 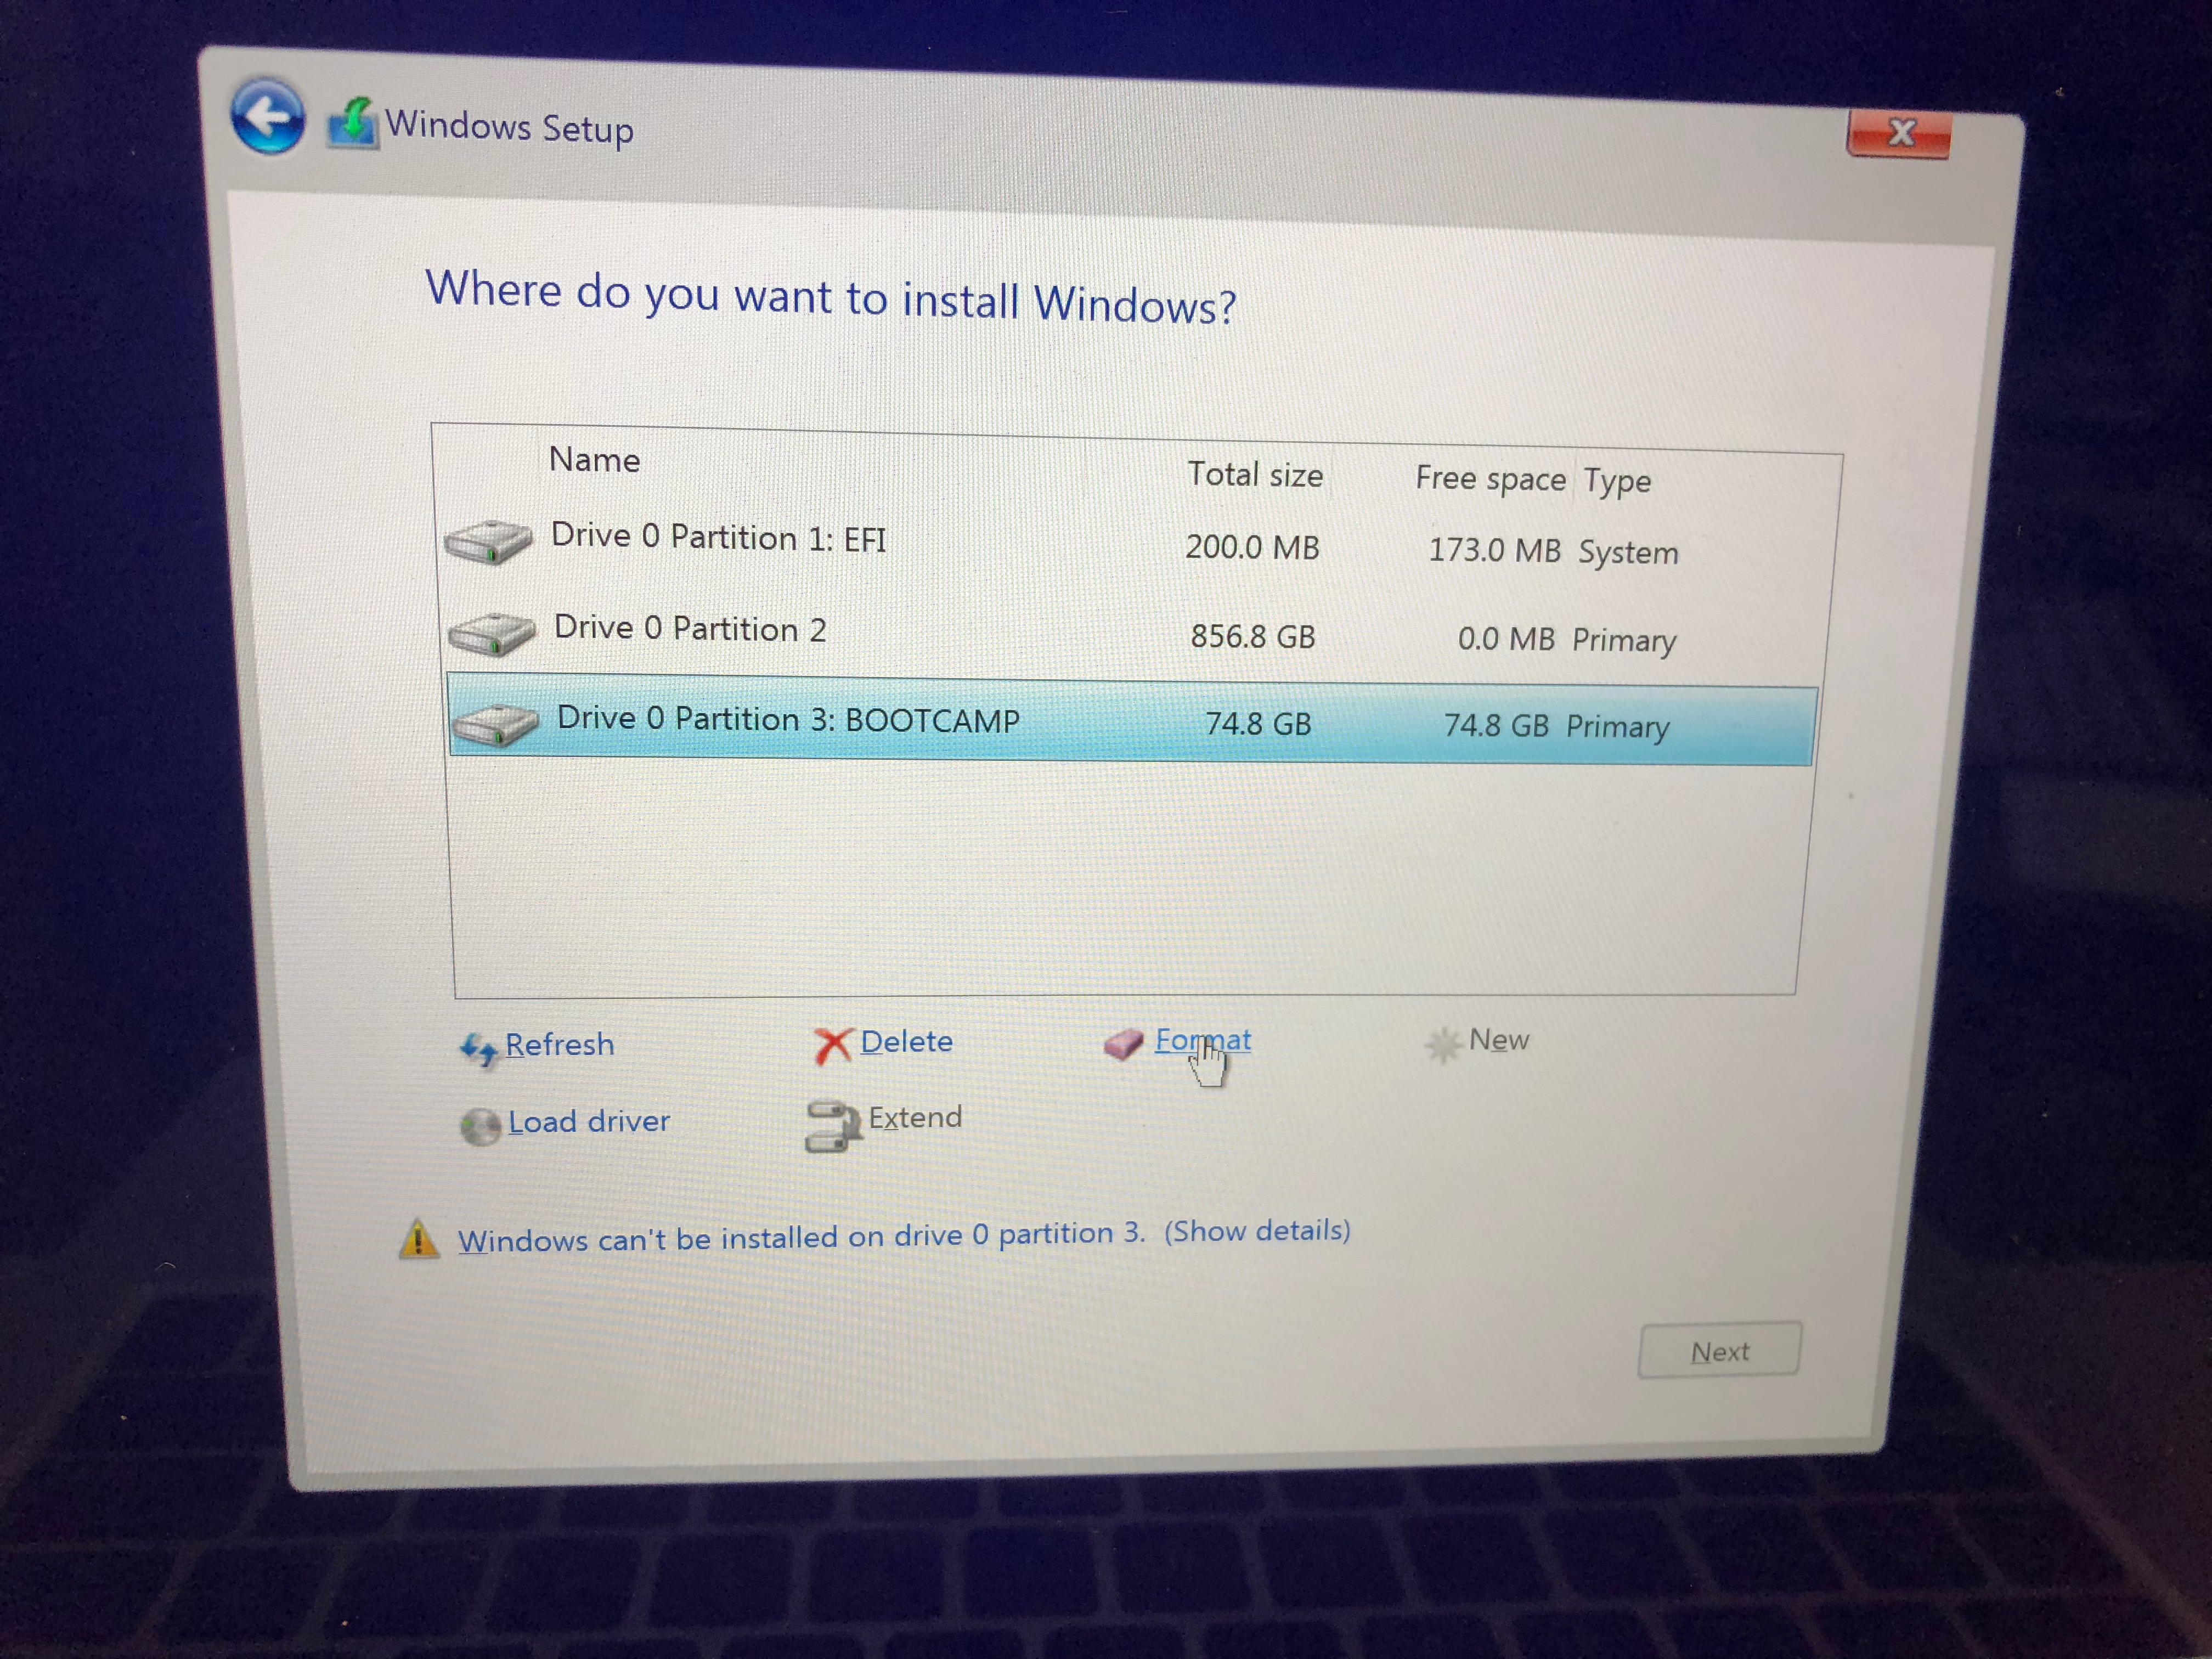 |
| 9. | Once Windows is finished installing the computer will reboot. As soon as it turns back on it will begin the BootCamp installer. Click Next and let it run the setup. It will restart again. If The boot camp installer does NOT start automatically, go to the WININSTALL drive, open the boot camp folder and start it from there. |  |
| 11. | Once the computer restarts, you are set; Windows is installed. To switch back to MacOS click on the little triangle in the bottom right corner, click the boot camp icon and choose restart in OSX |  |