
Zoom Pre-Assign Breakout Rooms
Click on images for a closer look.
Step 1: Preliminary Setup
Follow the steps below to enable Breakout Room and Allow Host to Assign Participants to Breakout Rooms When Scheduling in your Zoom account.
| 1. Log into https://temple.zoom.us/signin | |
| 2. Click on Settings on the left side menu |  |
| 3. Click on In Meeting (Advanced) | 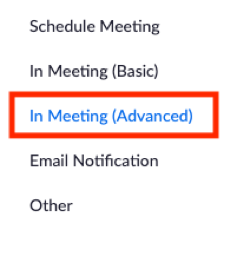 |
| 4. Enable Breakout Room and check the box for Allow Host to Assign Participants to Breakout Rooms When Scheduling | 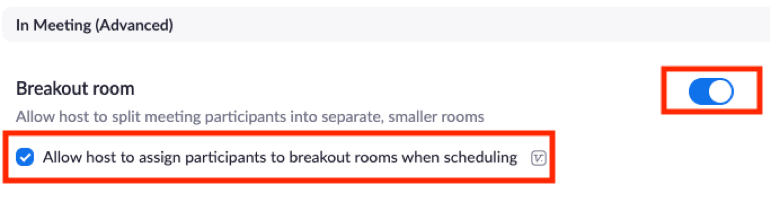 |
Step 2: Export the Canvas Gradebook CSV File
Export the Canvas course gradebook to get a CSV file containing the Temple Accessnet for each student in the class (example of an accessnet: tua12345). Temple accessnets are needed in order to pre-assign students in breakout rooms. Follow the How do I export grades in the Gradebook? guide for step-by-step instructions for exporting your gradebook. Please be sure you are completing this step on your work computer and delete the CSV gradebook file after completing Step 4 below or save in an appropriate location.
Step 3: Download the Zoom CSV Template for Breakout Room Assignments
Download the CSV template provided by Zoom here. You will be prompted to sign in with your Temple accessnet username and password and then the download will being. You will use this template to lay out the breakout room assignments that you will then upload to Zoom.
Step 4: Prepare the Zoom CSV Template File for Upload
| 1. Open the Breakout Room Pre-Assign CSV template that you downloaded in Step 3 | |
| 2. Remove the filler email addresses that are listed in Column B, but keep the text in cell B1 that says Email Address |  |
| 3. Open the Gradebook CSV file that you exported from Canvas (most likely located in your Downloads folder) | |
| 4. Select and copy the list of accessnets from your Canvas Gradebook CSV file. (Accessnets are listed under the column for SIS User ID or SIS Login ID.) Shortcut for selecting them all: select the first one and then press Ctrl Shift Down Arrow on your keyboard | 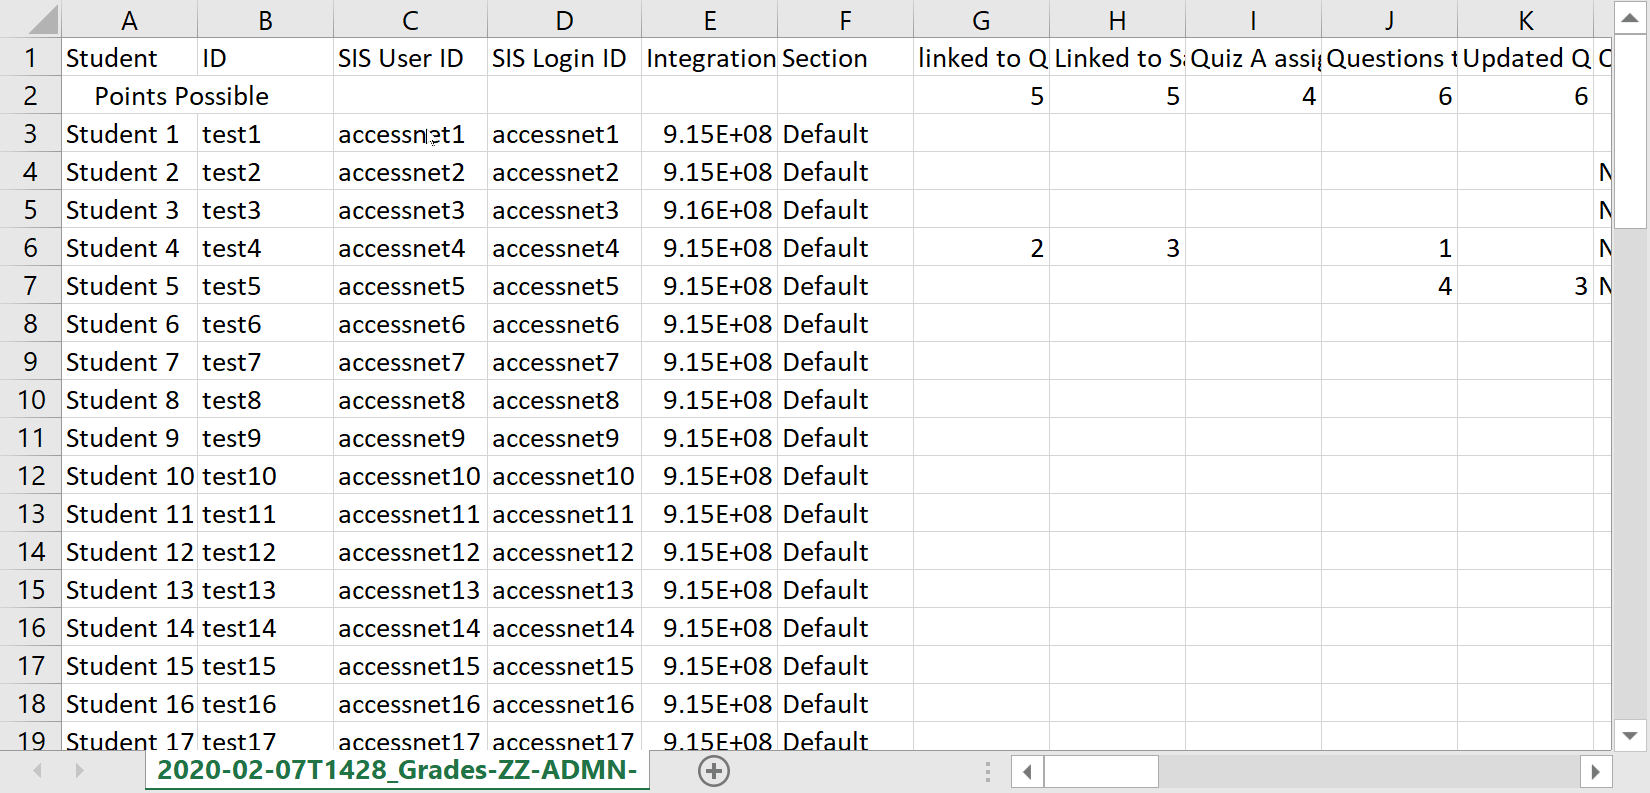 |
| 5. In the Zoom Breakout Room template CSV file, paste the list of accessnets in Column C, so that the first accessnet goes in cell C2 |  |
| 6. Next add “@temple.edu” to the accessnets to turn them into email addresses. In cell D2, enter this formula =CONCATENATE(C2, “@temple.edu”) |  |
| 7. Apply this formula to the rest of the cells in the list, so that all accessnets are turned into email addresses. Click on the cell D2 and hover over the bottom right corner of the cell so that the cursor is a black cross. Double-click on the corner so that the formula is applied to the cells. (Use the Fill Series technique to do this.) | 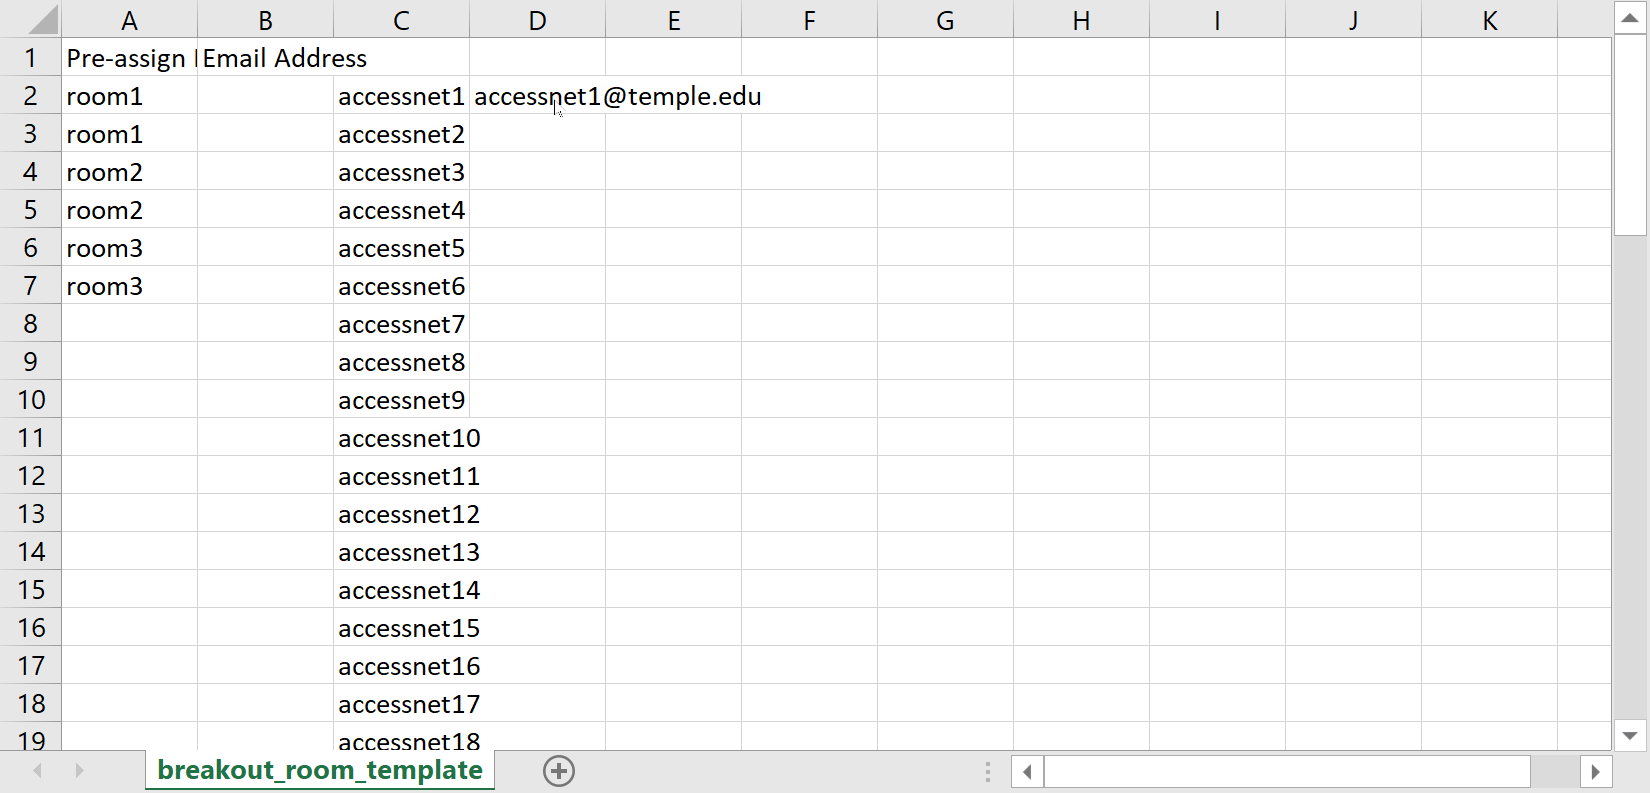 |
| 8. Select and copy all of the email addresses in Column D | 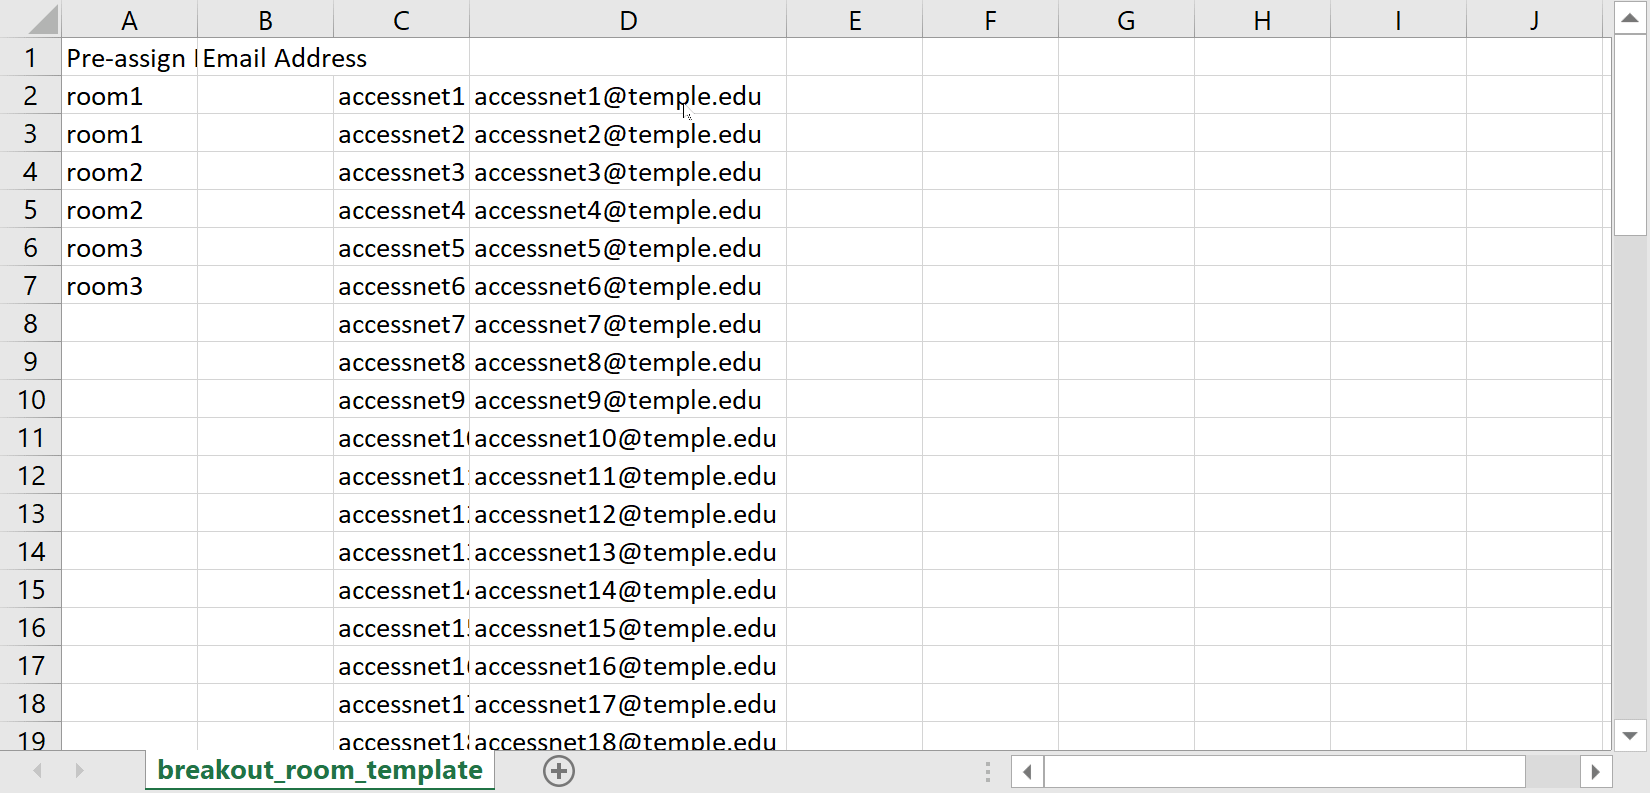 |
| 9. Click in cell B2 and right-click. Hover over Paste Special from the paste options and select Values. The email addresses will now be listed under Email Address in Column B |  |
| 10. Delete columns C and D |  |
| 11. Name the Breakout Rooms in Column A accordingly | |
| 12. Save your file to a location on your computer that you will be able to easily find when it’s time to upload the file to Zoom. Be sure to keep it in CSV format. |
Step 5: Add Zoom to the Course Navigation Menu in Canvas
| 1. Log into Canvas | |
| 2. Go into the course in which you will use Zoom | |
| 3. Click on Settings from the course navigation menu |  |
| 4. Click on the Navigation tab | 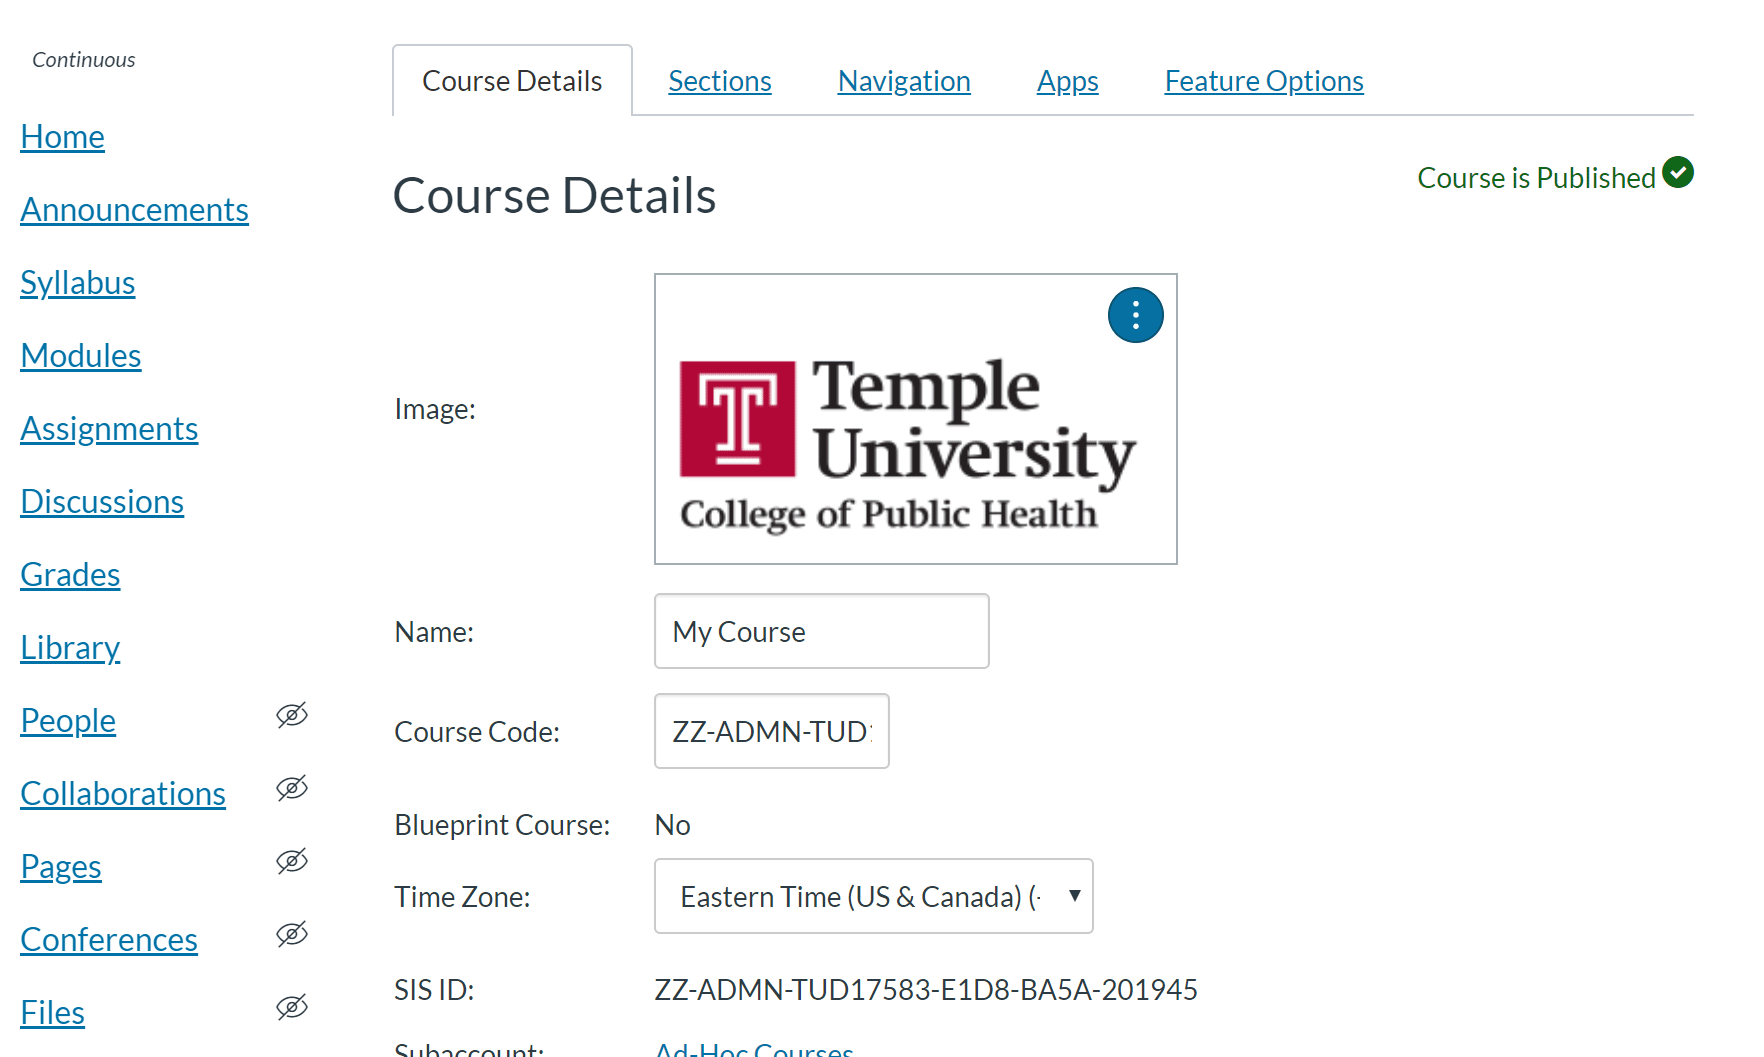 |
| 5. Locate Zoom in the bottom list. Click on it and click Enable. It will move to the top list of menu items (these are the menu items that are visible to students). | 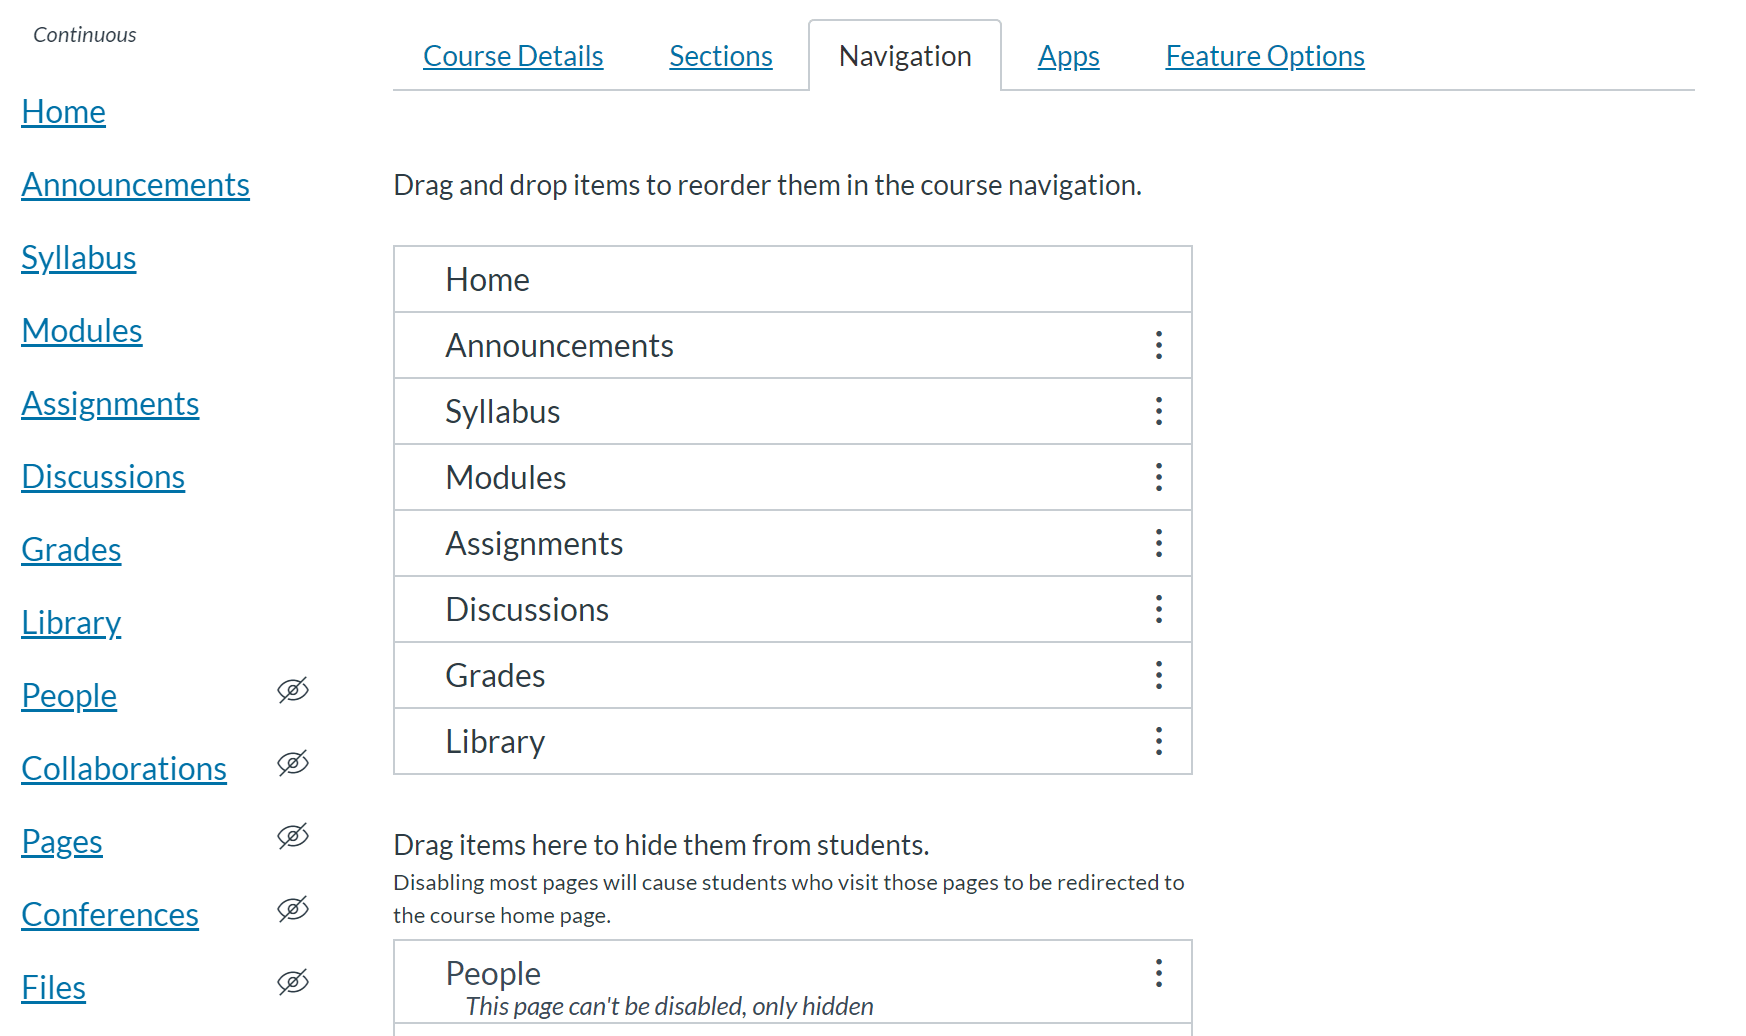 |
| 6. Scroll down to the bottom of the page and click Save | 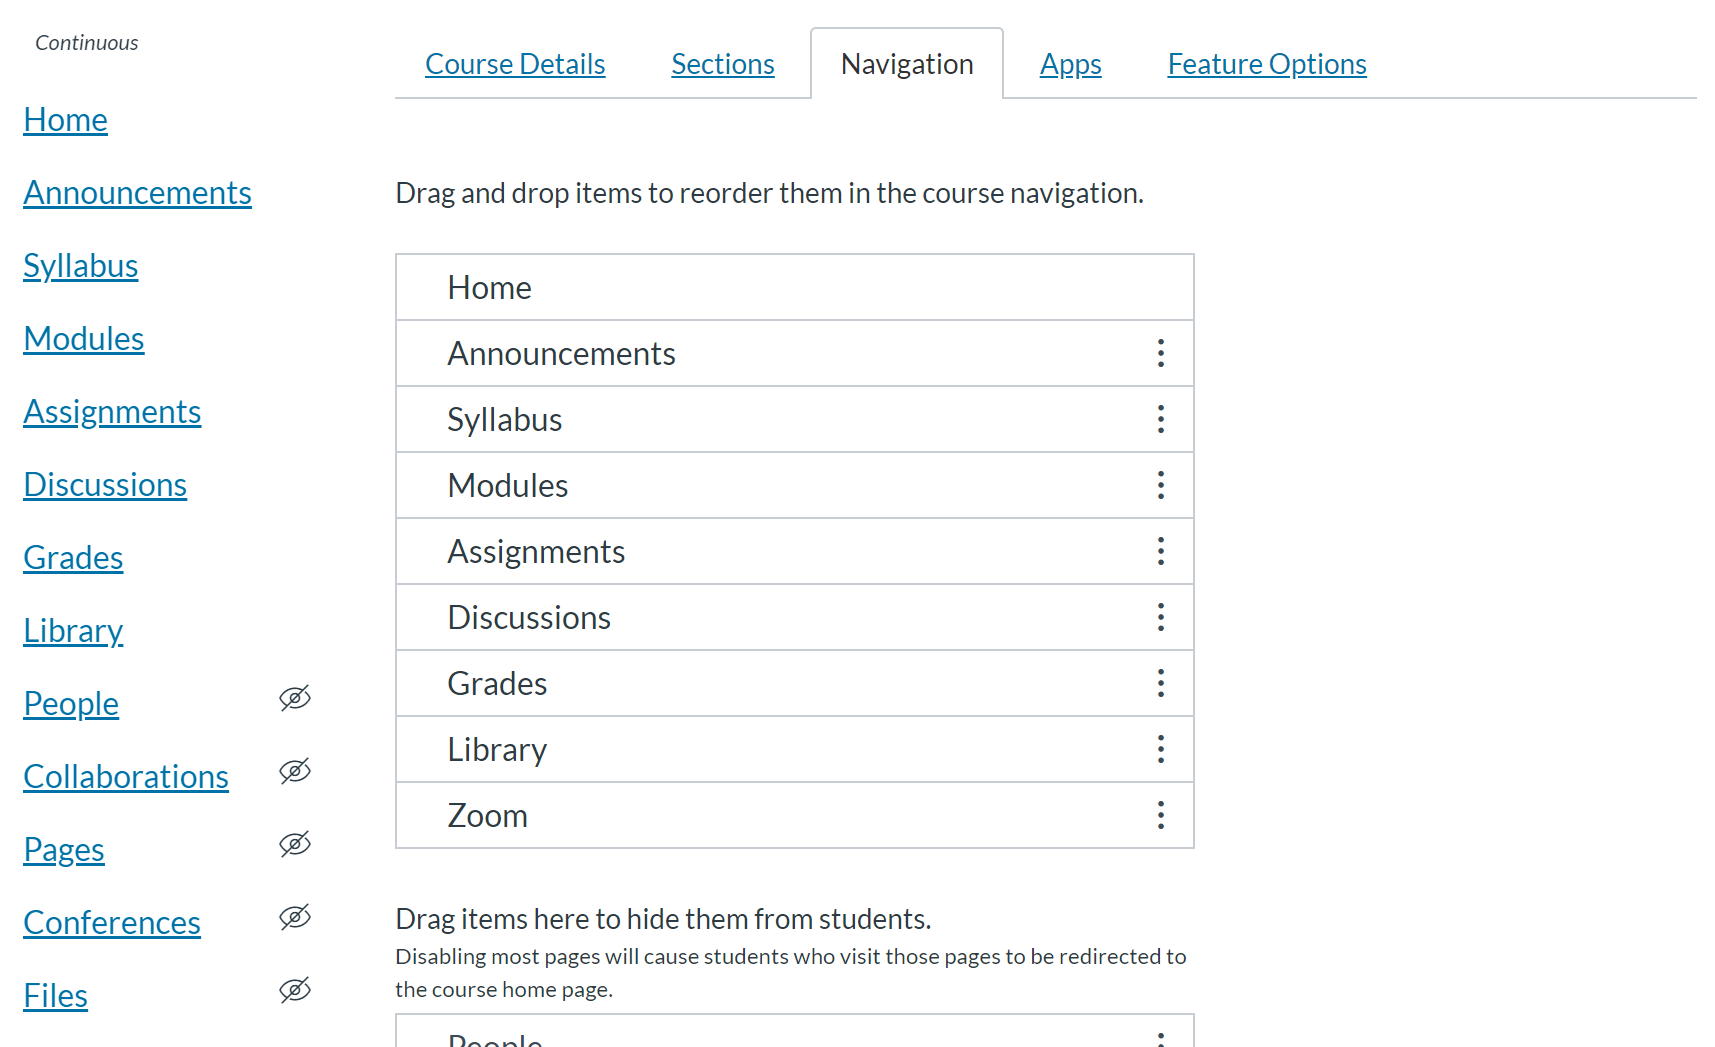 |
Step 6: Schedule the Zoom Meeting
Note for a video walk-through, please watch this video provided by the Center for the Advancement of Teaching (CAT)
| 1. Click on Zoom from the course navigation menu | 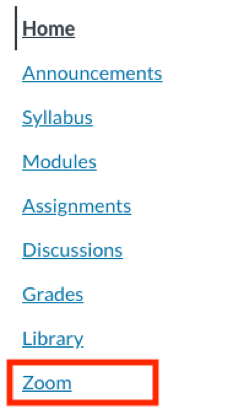 |
| 2. Click on Schedule a Meeting |  |
| 3. Enter the meeting settings and click Save | 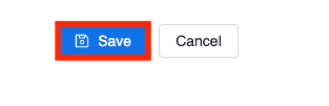 |
| 4. Open a browser window | |
| 5. Go to https://temple.zoom.us/signin and login with your Temple Accessnet and password | |
| 6. Click on Meetings from the left side navigation menu |  |
| 7. Locate the Meeting you just scheduled for the course and click on the name of it |  |
| 8. Scroll down and click on Edit Meeting |  |
| 9. If you have scheduled a recurring meeting and receive a message that asks if you want to edit only this meeting or all recurring meetings, click All if you would like to make changes for all recurring meetings. | 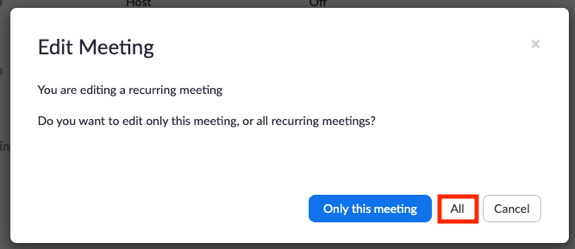 |
| 10. Scroll down to the Meeting Options section and check the boxes for Enable join before host and Breakout Room pre-assign | 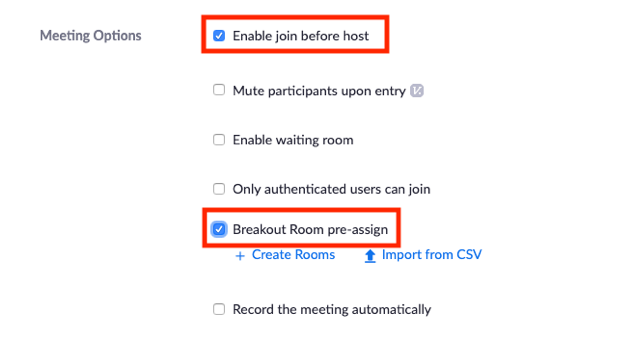 |
| 11. Below Breakout Room Pre-Assign, click on Import from CSV |  |
| 12. Drag and drop the CSV file into the box shown or click on Browse to choose a file | 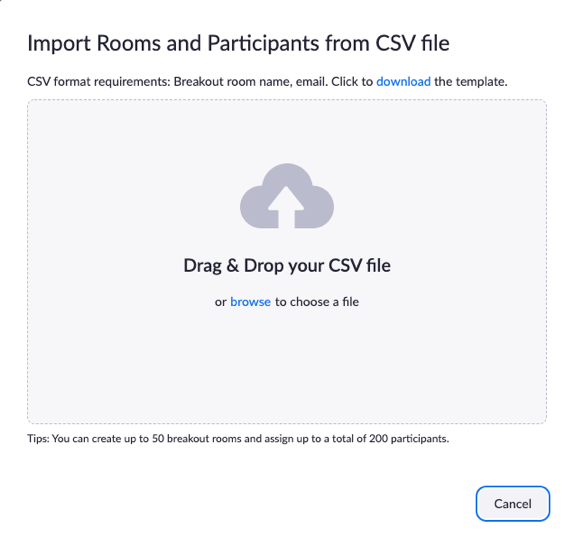 |
| 13. After the file finishes uploading, you will see the list of rooms and the email addresses assigned to each room. Click Save if everything looks correct | 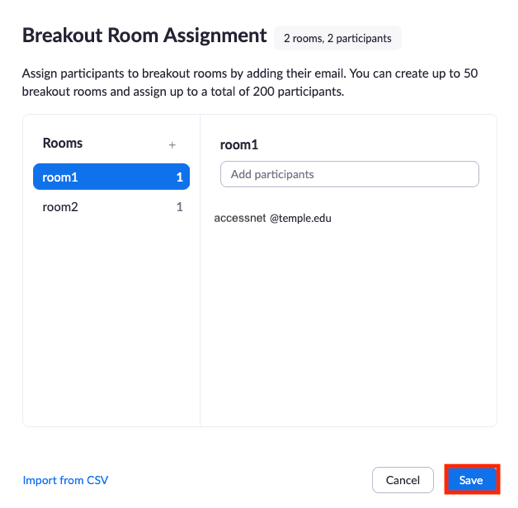 |
| 14. Click Save at the bottom of the page to save the changes to the meeting |  |
Step 7: Instruct Students on How to Join Meeting
- Prior to the first class session, instruct all students in your course to log into https://temple.zoom.us/signin with their Temple accessnet and password, so that their Temple University Zoom account is created and ready to go for the first class.
- Students should check to see if they are logged into the Zoom mobile app with their Temple accessnet email address. If they are signed into it with another account other than their Temple accessnet email address, then they will not be added to the breakout rooms automatically (some students may have previously created Zoom accounts under a personal email address or an alias of their Temple one). If a student is not sure if they are signed into the Zoom desktop application as their Temple accessnet or unsure if they are signed into it at all, they should contact Zoom Support or call the Temple Help Desk for assistance. For help signing out of the app, please see these instructions.
- For students who are not signed into the Zoom desktop application:
- Right before the students join your Zoom meeting, have them go to https://temple.zoom.us/signin and they will be brought to the Temple single sign-on page. They should sign in with their Temple accessnet and password as they do when logging into any Temple system. If they are currently signed into other Temple systems (tuportal, Canvas, etc), they will be automatically signed into Zoom upon going to https://temple.zoom.us/signin and they will see their Zoom profile on the page.
- Next, they should open a new tab in the same browser that they used in Step 1 and go to your Canvas course. Then they will click the link to join your Zoom meeting. This should bring them into the meeting under their Temple accessnet email address account.
Step 8: Start Meeting and Open Breakout Rooms
- When it’s time, start your Zoom meeting
- Follow the normal process of starting your Zoom meeting- connect to audio, start your video, etc.
- Because Enable Join Before Host is turned on, there may already be students in the meeting.
- When you are ready to start the breakout rooms, click on Breakout Rooms along the bottom of the Zoom window
- You may see some students assigned to the breakout meetings- these are students who joined the meeting before the host. When you are ready to start the breakout rooms but not everyone is showing as assigned to a room, click on Recreate and then click Recover to Pre-Assigned Rooms
Note: If there are only a couple of students who are not assigned, you can always manually assign them to a breakout room: click Assign next to the room and then select the name of the student to assign to that breakout room. Repeat this step as needed.
IMPORTANT: If a student joins the class session after the breakout rooms have already started, do not use the recover to pre-assigned rooms feature; instead, manually assign them to the room in which they belong, as described above. If you use the recover to pre-assigned rooms feature after you have already started the breakouts, it will start the breakout room session over again and any work within Zoom will be lost (writing on the whiteboard, sharing of screen, etc.).